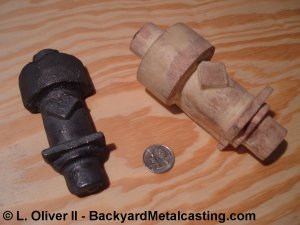
Here is a photo of the casting and the full model engine cylinder pattern. Obviously the casting was only of half the pattern in an "open face" mold. I just thought this was more exciting than pouring plain ingots. The thick section at the top will get machined into individual cooling fins on the actual engine casting. The lugs at the top and bottom of the pattern (and the casting) are actually core prints meant to hold a core and thus leave the casting with a hollow bore. But like I said I just felt like casting a fancy ingot.
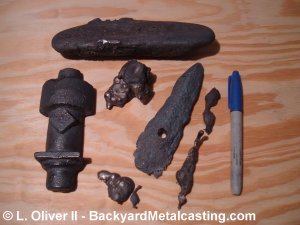
Here are the resuts of my iron casting sessions to date. Some of the wierd shaped pieces are from when I first tested the burner by setting a chunk of iron in the furnace with no crucible to see if it'll melt. It did and dripped out the bottom. Notice the hole in the "ingot" piece. I drilled that hole and the drill press did it fairly easily. This means that I'm not getting that ultra hard white iron i've read about. Sure this is a paultry display but none-the-less a new age in backyard metalcasting has begun!
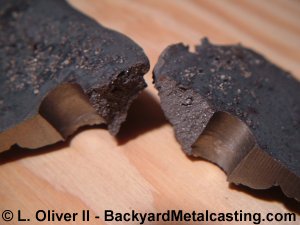
Here is the inside of the iron. It's a uniform grey color. I drilled a hole in the center then cut halfway and broke the other half. This was to test the hardness. It cuts and drills easily and there is no "white tip" which is when the iron cools too quickly and becomes super hard and unmachinable with a white layer on the inside. The outside is very dark, maybe from the iron absorbing excess carbon from the furnace atmosphere. It is a very reducing (less than optimal oxygen) atmosphere inside the furnace so there is excess carbon flying around. It is not likely that a homemade waste oil burner of the current level of technology (year 2007) will produce an oxidizing atmosphere. Oil needs entirely too much oxygen for that, so that means I should be casting great iron!
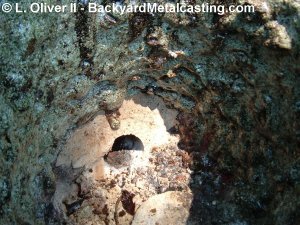
Here is the patched burner entrance hole looking at it from inside the furnace. This is the day after the melt. The patched area is in very good condition. Surprisingly the new refractory is not glazed. Possibly because in the refractory for this patch I used "type 3" portland cement which is the fast setting type. It has a higher alumina content making it more heat resistant. And speaking of cement, I've read comments where people have said the cement in the homemade furnace refractory serves no purpose. Incorrect! I put it in to harden the refractory quicker thereby reducing shrinkage. (Click the photo for a larger view).
Some people will make the mistake of looking at the photos of the burnt and glazed furnace refractory and blame the furnace destruction on the oil burner. They'll think that although waste oil is a free fuel, the cost of furnace replacment nullifies that. These thoughts are misguided. The oil is not the problem! When you melt iron the required heat is so intense that common refractory will be destroyed no matter what fuel you use! Cupolas often need repair after every use. So if you want to melt iron be sure to build your furnace with 3,000 degree F refractory.
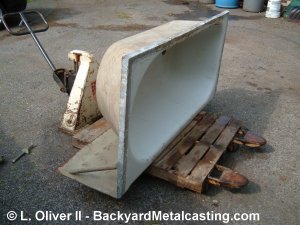
With the ability to cast iron I need a goodly supply of it. Here is a cast iron bathtub that I was given by the next door neighbor after they did some home remodeling. About a year earlier I got a water heater from them after it went bad and I used it to build my Hefty Harriette furnace. They also gave me about 300 pounds worth of corroded cast iron drainage pipes when they had their drainage system redone. Now I'm just waiting for the plumbing in their bathroom to bust so I can get some brass from them! But getting back to the tub... it weighs about 500 pounds. Moving this thing told me exactly why many modern tubs are fiberglass.
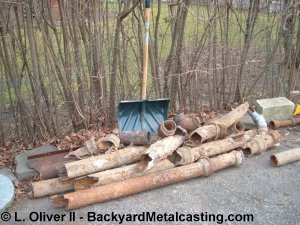
Here are those drainage pipes I mentioned previously. These pipes are easily broken with a sledge hammer and much of the corrosion falls off. I've read that thin iron is great for remelting and pouring into thin castings since the alloy is designed for that purpose. But truthfully I enjoy melting thick chunks more.
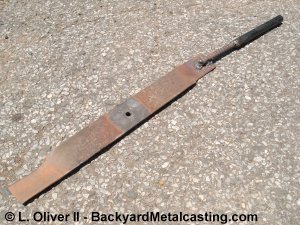
Molten iron is so hot that there are not many materials that will work well as a skimmer to remove the slag/dross. So I use a discarded steel lawn mower blade welded to a piece of rebar with a section of pipe welded on as a handle. There's no sense in using anything fancy. I have another blade to replace this one as it burns and melts away.
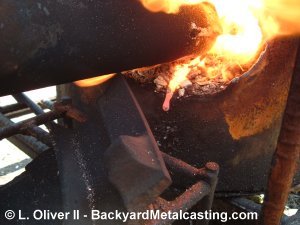
Here's a photo of some molten iron dripping out the burner hole before I patched it. The iron wasn't in a crucible I just dropped a large thick chunk in the furnace to see if it'd melt. It was so thick that I couldn't break it to crucible size with the sledge hammer.
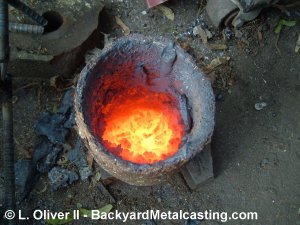
Here is iron and slag that solidified in the crucible during the first iron melt. Unfortunetly I didn't get the iron hot enough to be able to skim it properly so some of it and the slag cooled in the crucible as I was pouring. However I still used it for another iron melt a couple days later. I used it just for the heck of it, and because it's my only clay crucible anyways! I was happy to see that this re-melted and the crucible did not crack.
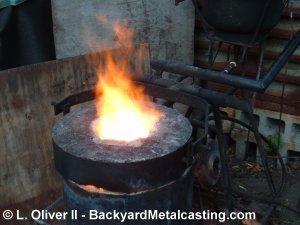
Here is the furnce running on used motor oil and melting iron. Note the lack of smoke. The iron starts melting about 25 minutes after putting the crucible in the furnace. A good iron melting flame completely fills the furnace and blasts about 12" above the lid. And believe it or not the oil flame is quieter than a propane flame! This is because oil burns at a slower rate than propane. It's a principle of thermodynamics involving "flame fronts" and other jargon. Go to the next page.