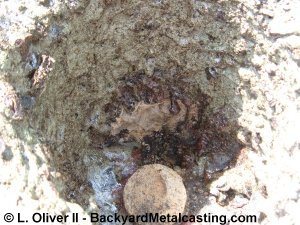
This was the aftermath of my first "controlled" iron melt. The inner chamber's refractory is seriously melted, vitrified and glazed. This has happened before when melting brass but not as seriously as this. Interestingly notice the non glazed spot in the center of the screen (above the plinth block). This is where the burner blew the sprayed oil into the chamber to ignite. Obviously the oil spray kept this spot cooler while the flames blew around damaging all the other spots. This damage was all the evidence I needed to decide that a comercially prepared high temperature refractory was neccesary for operation "Hefty Harriette."
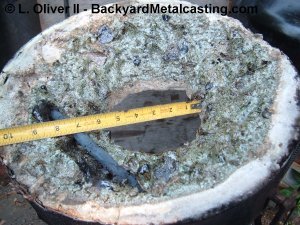
But just in case the above evidence was not enough there is "exhibit B." The lid really took a hit. This is a photo of the bottom of the lid. It is so erroded away that is is bowl-shaped. Granted this is the result of a few years of usage, but surely I have to conclude that the homemade fireclay-based refractory is not up to Lionel's Laboratory standards! But the good news is that if I can melt iron with refractory this ragged and a furnace lid this worn out (the vent hole is erroded from 3" to about 5" diameter now) then wait 'till I build a new furnace...!
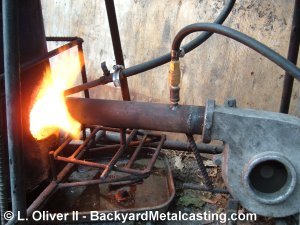
Here is a photo of the actual burner during the first iron melt. I call it "The Brute" because it is so simple in design and melts metal with absolute brutal heat. For anyone interested technical details about this burner are on the oilburners part 9 page. Notice how the flames blow back out the burner hole. This is because the hole is oversized. It was sized to fit the G5 burner which has a 3" diameter flame port. But this new burner is much smaller. This is a big loss of heat out the furnace and must be patched. Proof of the large heat loss is the aluminum heat transfer ring that melted off from the tip of a burner back in the Oilburners part 8 segment.
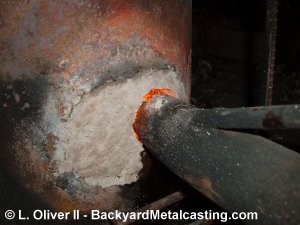
Here is the hole after I patched it with refractory. The results were outstanding. The metal melted easier because there was so much less loss of heat. Now after seeing how just a small repair in the refractory improves melting I really can't wait to build a new furnace! But in the meantime...
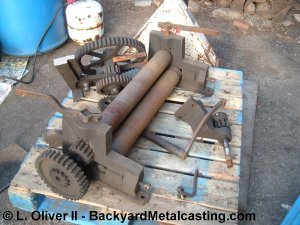
This is some prime scrap. It's an antique slip rolls machine used for rolling sheet metal into cylinders. It's in such poor condition (even before I started wrecking it) that it wasn't worth repairing (in my opinion) and I didn't feel like listing it on an auction. So it's gonna be melted.
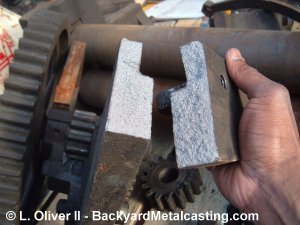
Here is a look at the iron after I broke a section with a sledge hammer. This is prime iron! Nice grain structure and look how thick and "meaty" it is. For general iron casting I consider this to be premium grade, choice selection iron! The number one draft pick! But for a small cupola furnace thin scrap like the fireplace insert on the previous page is best since cupolas usually require specifically sized pieces of scrap. For more on that see the oil burner Vs. cupola page!
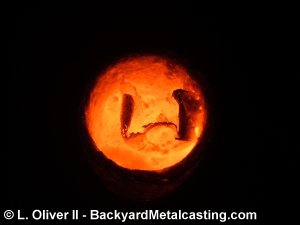
Here is the crucible out of the furnace after melting a piece of the slip rolls iron. it seems that everytime I melt iron (granted this is only my second official iron melt) the outside of the piece of scrap turns into a crispy "shell" and the iron within leaks out the bottom leaving an "exoskeleton" of crud at the top of the crucible. Notice the "exoskeleton" I mentioned floating on top of the molten iron. If my refractory were in good condition I could probably get more complete melting but heat escapes all over with my current furnace.
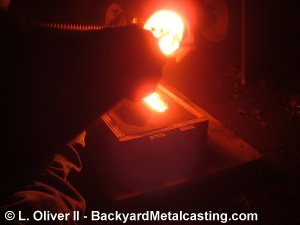
About 30 minutes after putting the crucible in the furnace here is the iron pour. It's not the best photo obviously. Since I work alone I take the action photos with the camera on a tripod with the automatic timer set. Since this casting session was at night and the only avilable light was from the furnace, I mistakenly set the camera tripod at the wrong angle.
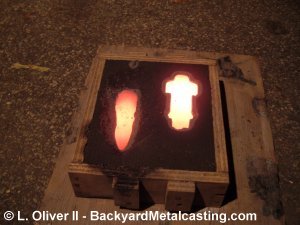
Here is the iron in the mold about 3 minutes after the pour. I have to be honest, this iron casting stuff is a lot easier than I expected. To me it's just like casting aluminum just a lot hotter. And it shrinks less than aluminum so that is nice. And with injector-type oil burners the cost of melting iron is the same as aluminum. The only drawback is that the higher temperatures require furnaces to be built with high temperature refractory rather than the homemade stuff that you can get away with for aluminum.
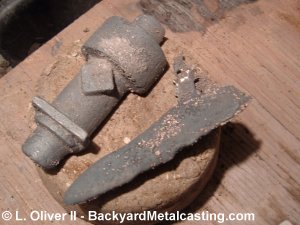
Here are the "castings" after a cooldown. One is just a partial ingot and the other is the result of me using half of a model engine cyclinder pattern for an open face mold. From what I had read I was expecting the iron to turn the molding sand to glass and have to grind it off the castings or dissolve it with acidic "pickling" solutions. All of that seems to be an exageration fortunetly. But then again these are small pieces, we'll see what happens when I start casting larger ones. Go to the Next page.