Part 1: I need pulleys - Part 2: Bet you can't cast just one - Part 3: What a messy lathe you have
My first idea was to make a cheap pulley from a piece of 3/4" plywood sandwiched between two thin disks of plywood to make a crude pulley. I'd then use this to power the lathe and machine a cast blank made from the pulley blank pattern.
This plywood pulley does work because I've used it back in 2001 to power a wood lathe that I built from 2 X 4 lumber. The lathe wasn't accurate (not because of the pulley) so I dismantled it. But the point is that this option has merit. I was even more convinced when I found out that the pulleys on Bruce Metzger's homemade milling machine were home machined.
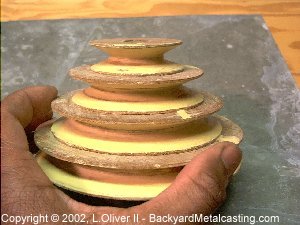
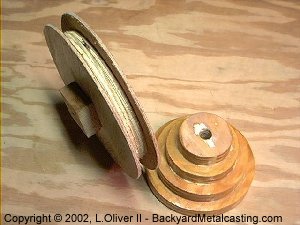
One day out of no where it occurred to me how I can make accurate pulley patterns with nothing more than hand tools. In one weekend I made two step pulleys like this, a 6" pulley (for the lathe's countershaft) and a 4" pulley for the lathe's automatic lead screw mechanism. This has been a major leap forward from the plywood design.
I tried molding the pulleys (the step pulley and 6" pulley) in sand but after the 12th or 13th failed attempt I was ready to put the damn patterns on the countershaft and go with that! However I figured that a plaster mold may allow easy removal of the pattern without serious mold damage and I'd have a reusable mold! The mold came out well! It's pure plaster-of-Paris. Everything is on schedule.
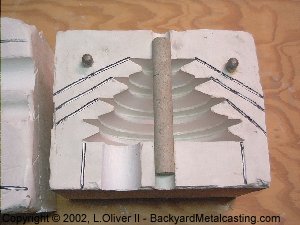
I even made a core for it so I don't have to drill the bore out! The black lines highlight the vents I carved in it. Things couldn't be better!! Let's pour this bad boy...
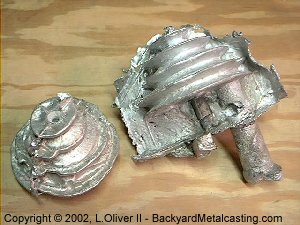
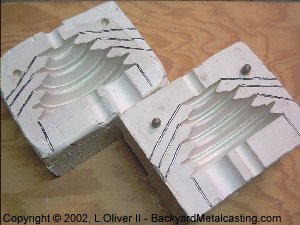
Unfortunately I didn't let the plaster dry enough (I even put it in the oven for a few hours and left it on the fireplace a couple days!) so when I poured the metal, steam formed (sounded like boiling water!) and shot the metal out the mold almost faster than I could pour it in. I kept pouring hoping the steam would finally stop in time to fill the mold completely but heck no.
This however dried the plaster a lot more so the second pour (the one on the right) was better but still not good enough. And the mold was in worse shape evident of all the "flash" or "fins" around the pulley shape. Sadly the mold crumpled when trying to remove the second casting so that was the end of that... As an aside, I've successfully poured lead into a homemade plaster mold but it was a much smaller mold.
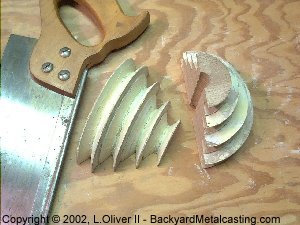
Since the trouble when trying to mold this pattern in sand was that the cavity was damaged whenever I would lift off the cope I figured that I need a safe way to get the pattern to slide out when the cope is lifted. I was contemplating how I might be able to use "follow boards" or "match plates" when suddenly one day while not giving the problem much thought it occurred to me... Split the pattern in half so when the mold is opened half stays in the drag and the other half in the cope then lift the halves out! What took me so long to realize that??!
I cut the pattern in half with a basic wood saw. Actually it's the type that has that stiff metal strap on the top to keep the blade straight. I forgot the name for it, I think it's a miter box saw.
April/5/2002 update;
Someone mentioned to me that the pullies would end up a bit off-round when the halves are placed back together because the blade removes some material. Nay! I already thought of that so I glued a flat piece of cardboard (the thickness of the saw blade) to one of the pulley halves to make up for the saw's kerf and maintain a fully round pulley.
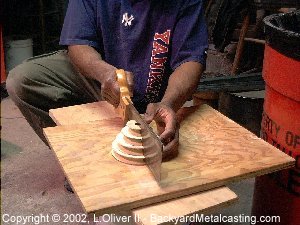
Here is the cope half of the mold with its respective half of the pattern removed. This split pattern method is so great that I molded the pattern successfully on my first attempt! Also note my quality molding bench/table. That's right, a sheet of plastic spread out on the floor...
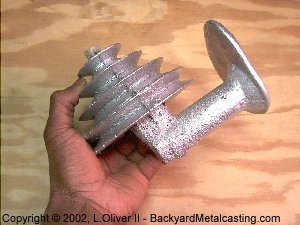
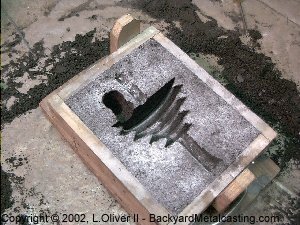
Here is the end result. The pulley came out very nice. You can see part of the core sticking out the top. It's made from a mixture of plaster-of-paris and wood ash. The mix softens when wet and is easily scraped out with a screwdriver. The bore is then cleaned up with the appropriate sized drill bit.
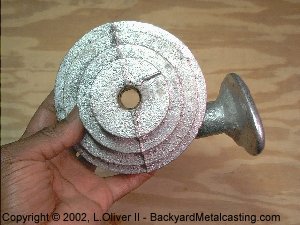
Here you can see the bore left by the plaster/ash core.
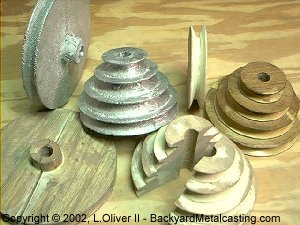
Here is a picture of some pulleys I cast and some pulley patterns I made. The single groove pulley on the left is 6" and is the outboard pulley for the lathe's countershaft. It took about 4 attempts to mold it with the split method but I got it cast properly with only one pour. Once the lathe is far enough along I'll cast more pulleys and clean them up on the lathe.
Take a look at making pulleys part 2!
Part 1: I need pulleys - Part 2: Bet you can't cast just one - Part 3: What a messy lathe you have