This is an ingot of silicone bronze. I bought it online from Budget casting supply. The benefit of this is that there is no (or only trace amounts) of zinc and lead. So there are no toxic fumes when melting it. Also since there are no metals vaporizing out of the bronze, the alloy doesn't change as regular brass or bronze can. But I have to admit that I DO NOT like the appearance of silicon bronze castings. It looks orangish rather than the golden-yellow color or regular bronze. I ended up mixing this bronze with some regular bronze. Mainly because this ingot wasn't enough to completely fill the mold for the casting I was making and I was too cheap to buy more of this alloy.
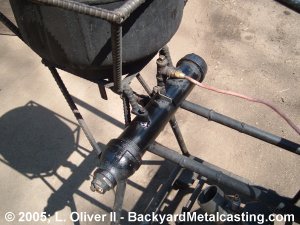
I decided to "kick it up a notch" by adding an oil heater to the foundry. Some cooking oil is rather thick and creamy and this heater turns it all into a loose liquid. Also during the winter this is almost essential since the oil is very thick (high viscosity) when cold. I call this the "hot tank" (the small cylindrical thing under the big tank) The electric water heater element only heats the oil in this small tank. Then as oil enters the burner, new (cold) oil enters from the main tank to replace it and is heated. To protect the element the oil exits from the top so even if the large tank is empty the hot tank will remain full. This system is more energy efficient than heating the main tank, it only takes about 3 minutes to get the oil to over 200 degrees! It burns well and is easy to ignite. Pressure is releaved through the main tank and any water in the system boils out.
This is the new oil heater assembly. It's based on the design used to warm up old fashined blow torches. The reason for this change is that two consecutive electric elements burned out for no known reason. I don't have time for ridiculousness like that so I went with the simple method as shown. Just pour some flammable liquid in the pan and light it. The flames will heat the oil in the hot tank. At $.99 per bottle I can easily afford to use 1/2 a pint bottle of rubbing alcohol each furnace run to heat the tank. And I really only use this in the winter anyways. But I have successfully melted metal WITHOUT a heater when the temperature was below freezing (it was 13° F.) and the oil burned well. Thinning it with gasoline works great also if no heater is available.
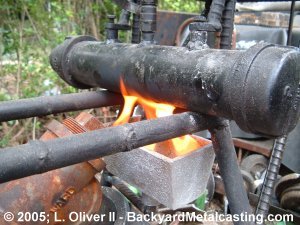
I also decided to step my game up and use a refractory crucible. This one is clay-graphite and was purchased on Ebay. The worst part about using a clay-graphite crucible is that you have to temper it in the furnace before use. This is done by heating it to 200 degrees F. for 20 minutes then letting it cool to room temperature. Even though this step is neccesary to remove moisture before the first use of the crucible, I'd much rather be able to just load the metal in the crucible, put it in the furnace and set the burner to "blast off!" I'm not very patient, But I don't want a busted crucible so I'll temper it...
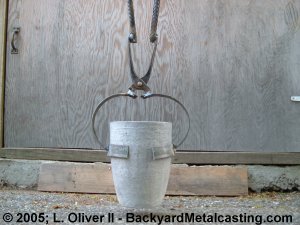
Since I'm using the refractory crucible I needed a pair of tongs (to lift the crucible out of the furnace) and a pouring shank (to pour the metal) which had to be specially designed for this crucible size. Needless to say I built them myself. Their actually rather crude since I just slapped them together in my excitment to use my first refractory crucible. These tongs are based on the pair of dollar store pliers in the center. I just welded attachments to them as needed.
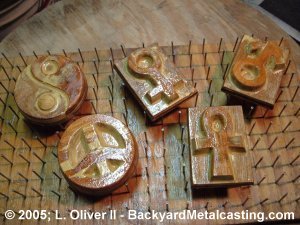
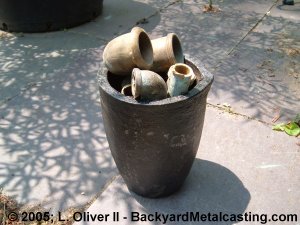
Here are some patterns for the bronze castings I intend to pour with this foundry run. These are some of decorative paper weights of popular symbols. These patterns are freshly coated with polyurothane and drying on my special drying board. It's basically just a board with nails in it to support the patterns so they can quickly dry on all surfaces.
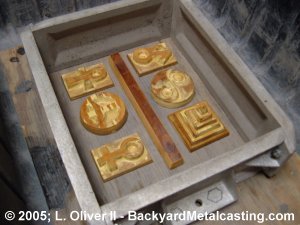
In this photo the patterns are arranged on the molding board. It turned out that I had to first make a "false drag" since I wanted the items to be cast face down in the mold.
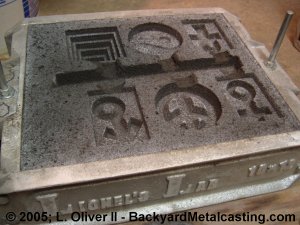
Here is one of the molds for the paperweights I'm casting several at a time using a runner system.
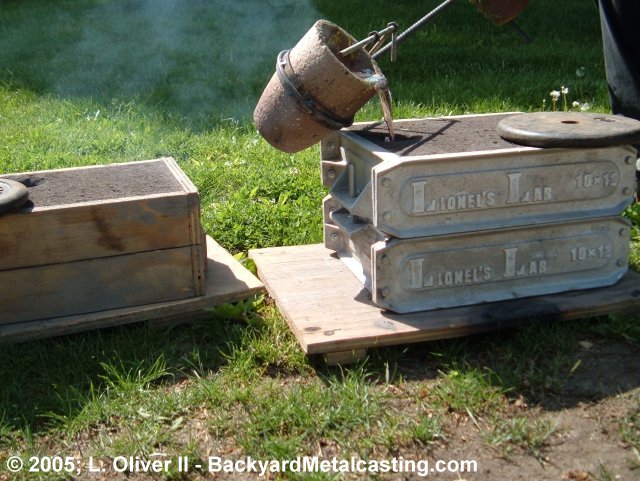
Pouring the metal is probably my favorite part of the metalcasting process. But unfortunetly this one did not go so well. The metal is not hot enough. The bronze should glow red as should the crucible. Most likely the metal will not fill the mold... Oh well, at least my pouring shank worked properly. But it was very wobbly. It is after all only made from 1/2" steel rebar and some other scraps I had laying around! (Click photo for larger view)
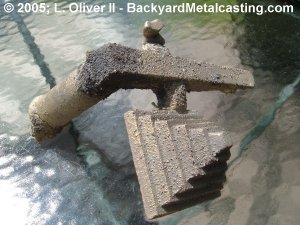
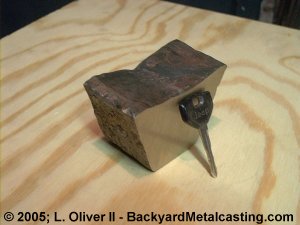
I was right, the metal cooled before filling the mold. Only the ziggurat (Ancient Egyptian stepped pyramid) casting turned out. Mainly because it's basically a solid chunk of metal. Let's try this again shall we? Go to the; Previous page -- Next page.