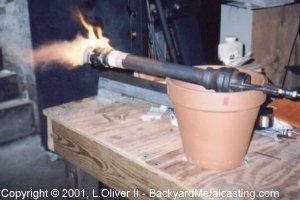
Here is some information on my homebuilt burner. I've decided to design my own (or at least modify existing designs) rather than just build a copy of someone else's. I think that's part of the fun! Plus you can make great improvements! A thanks goes out to Jeffrey Bell and his website for answering some of my questions while building my first burner.
CAUTION! Working with propane can be dangerous, especially when proper safety precautions are not taken. Because of the variations in materials and workmanship there are no guarantees on the information in/on this web site. This information is simply what I have been successful with in my own experiments. I will not assume responsibility for any injury, loss, or damage that may result from following the instructions, advice or plans on this web site. There are always dangers in foundrywork and they have been pointed out whenever possible but it is not the purpose of this web site to mention all known or unknown dangers. Always follow the manufacturer's instructions for regulators, adaptors and other parts. |
Propane burner number 1
This is my first propane burner ever. I combined the "Monster burner" and "Bienstock modification" from Ron Reil's forge and burner page but I made some sneaky improvements! |
|
The burner pipe and reducer coupling is the same size as the "monster burner" but instead of putting the fuel jet pipe through the reducer on a tangent I used something similar to the "Bienstock modification" by welding a brace to a piece of pipe screwed into the reducer so I could support the fuel jet pipe straight in line with the center of the burner and slide it in and out for fine tuning. In the picture there are sections cut out of the piece of pipe screwed into the reducer. My theory was that since the section of pipe screwed into the reducer decreases the opening slightly cutting part of it out would make up for it. In reality the cuts weren't needed and it just makes air turbulence. Additionally, I used only one 3/8-inch diameter brace and a piece of square tubing (jet pipe holder), both of which simplify construction. Notice the "T" shaped setscrew (1/4" diam. rod welded to 3/8" bolt). The biggest breakthrough is the cap at the end of the jet fuel pipe. Since the orifice is drilled into a cap instead of a pipe imbedded in the reducer, I can change orifice sizes with EASE! If I want to melt aluminum or brass I use a cap with a #58 hole in it. If I want to melt iron I’ll switch to a cap with a #54 hole in it. |
|
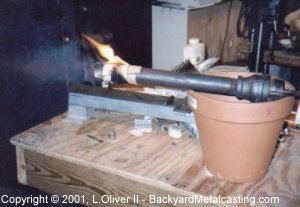
Here is some declassified test footage. Instead of forging a flare from pipe I simply rolled what I thought was thin sheet steel into a cone with the 1:12 slope and used a strip of cardboard as a collar. Notice the cardboard burning and the flare failing. You can barely see the blue flame, not very cone-like yet. | |
Little did I know it was actually sheet aluminum (I could'a sworn it was steel, it had factory painted surfaces which made it harder to judge plus I was rushing.) and it began melting immediately. | |
Check out the Oliver burner #1 "Upwind model"! |
Copyright © 2000, 2001 by Lionel Oliver II All Rights Reserved.
This site was created Sept. 28, 2000