
The form to leave the inner core of the furnace is rolled from several pieces of cardboard taped together. The inner core will be 6 1/2 inches diameter which will hold my 4" crucible nicely. The forms are rolled over 6" coffee cans.

This is the burner support pipe. I used a method called "parallel line development" to make the paper template which tells me where to cut the pipe so it will contour with the inside of the refractory.
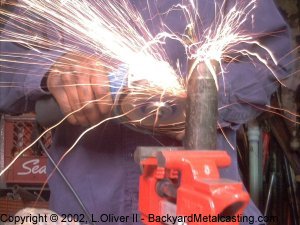
Here I am cutting the contour on the pipe with a small handheld grinder and cutting wheel. It's a cheap imported "no-name" brand but works very well. I bought it for $13.00 at a flea market. If I waited 'til I got to a booth 20 feet away I'd have gotten it for $10.00!
The cutting wheel is a name brand wheel however.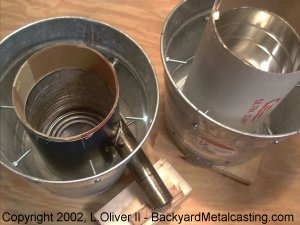
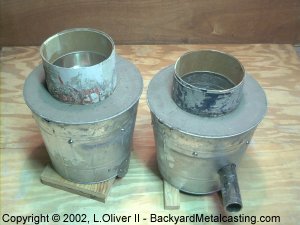
At last both buckets are prepped and ready for refractory. Notice how the "burner support pipe" contours to the inside form. These buckets are galvanized and I recommend non-galvanized if you can find them. But from my experience the outside of the furnace doesn’t get hot enough to vaporize the zinc and release toxic fumes.
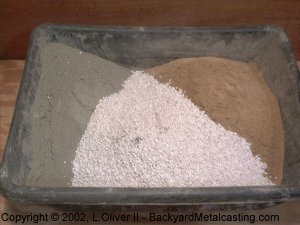
The refractory mix is composed of Portland cement, silica sand, perlite and fireclay. The first three components are mixed together thoroughly then moistened and then the fireclay is mixed in. The formula was inspired by Jeffrey Bell's success but the proportions are way different.
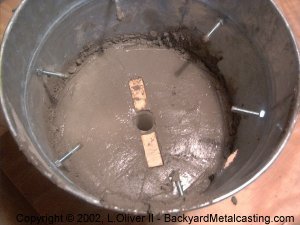
This is the base of the furnace. The hole will be a drainage hole in case of spills or broken/burned thru crucibles. The dowel pieces are split in half and will leave a trench in the refractory leading to the hole. These trenches will allow spilled metal to access the hole rather than being blocked when a "plinth" block or piece of brick is set on the base to hold the crucible.
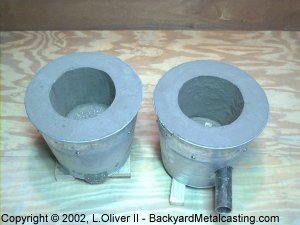
Both furnace halves are nice and full of refractory.
After a day and a half of curing I removed the forms. They can be pulled out by gripping the cardboard with pliers as a partner holds the furnace down. Or you can do as I did and stand on the furnace barefoot (so not to damage the refractory with the treads of your footwear) and pull. The moist tube will come out like a spiraling ribbon bringing the can with it.
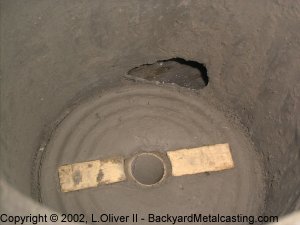
Here's a closer look at the base. Notice how nicely the burner support pipe contours with the inside wall.
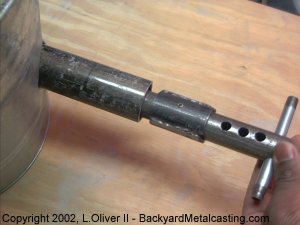
Instead of the traditional method of using set screws tapped into the burner support pipe to hold the burner tight I decided to make a small collar to fit around my burner. The collar has welds along the sides which have been ground down just enough to let it slide in and out of the pipe smoothly while keeping the burner centered!
Part 1: Building the furnace - Part 2: Firing this bad boy... - Part 3: Back in business